I wanted to make a floating nightstand for my bedroom. As usual I started off by designing something in Fusion 360 to figure out measurements and make sure I like the size/look/etc:

Once the design was finalized I cut down some 3/4″ maple plywood to build the basic box, including edge banding all the sides that would be visible. Then I assembled the basic box:

Notice on the underside of the top are a few pieces of scrap plywood attached for rigidity, including a couple hidden dowels that extend into the side panels. This, coupled with plenty of wood glue, will (hopefully) ensure the case doesn’t start to separate over time.
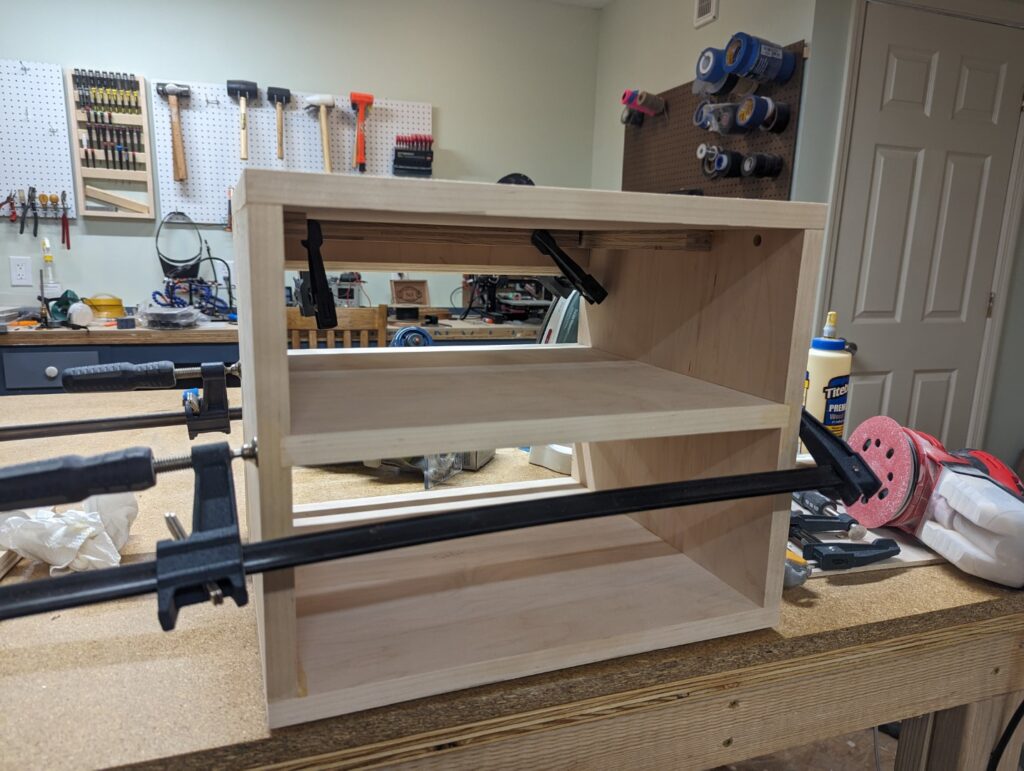
The box was glued up and you can just see the cleat at the back being attached as well. Lots of sanding and the case is mostly done:

Next to work on the drawer face (perhaps not totally the “correct” order, but I was excited to break out my hand planes). I recently picked up a nice board of walnut from a local, cut it roughly about 1″ oversized on all sides so I’d have plenty to work with and make sure each side was solid. Then I got to planing!
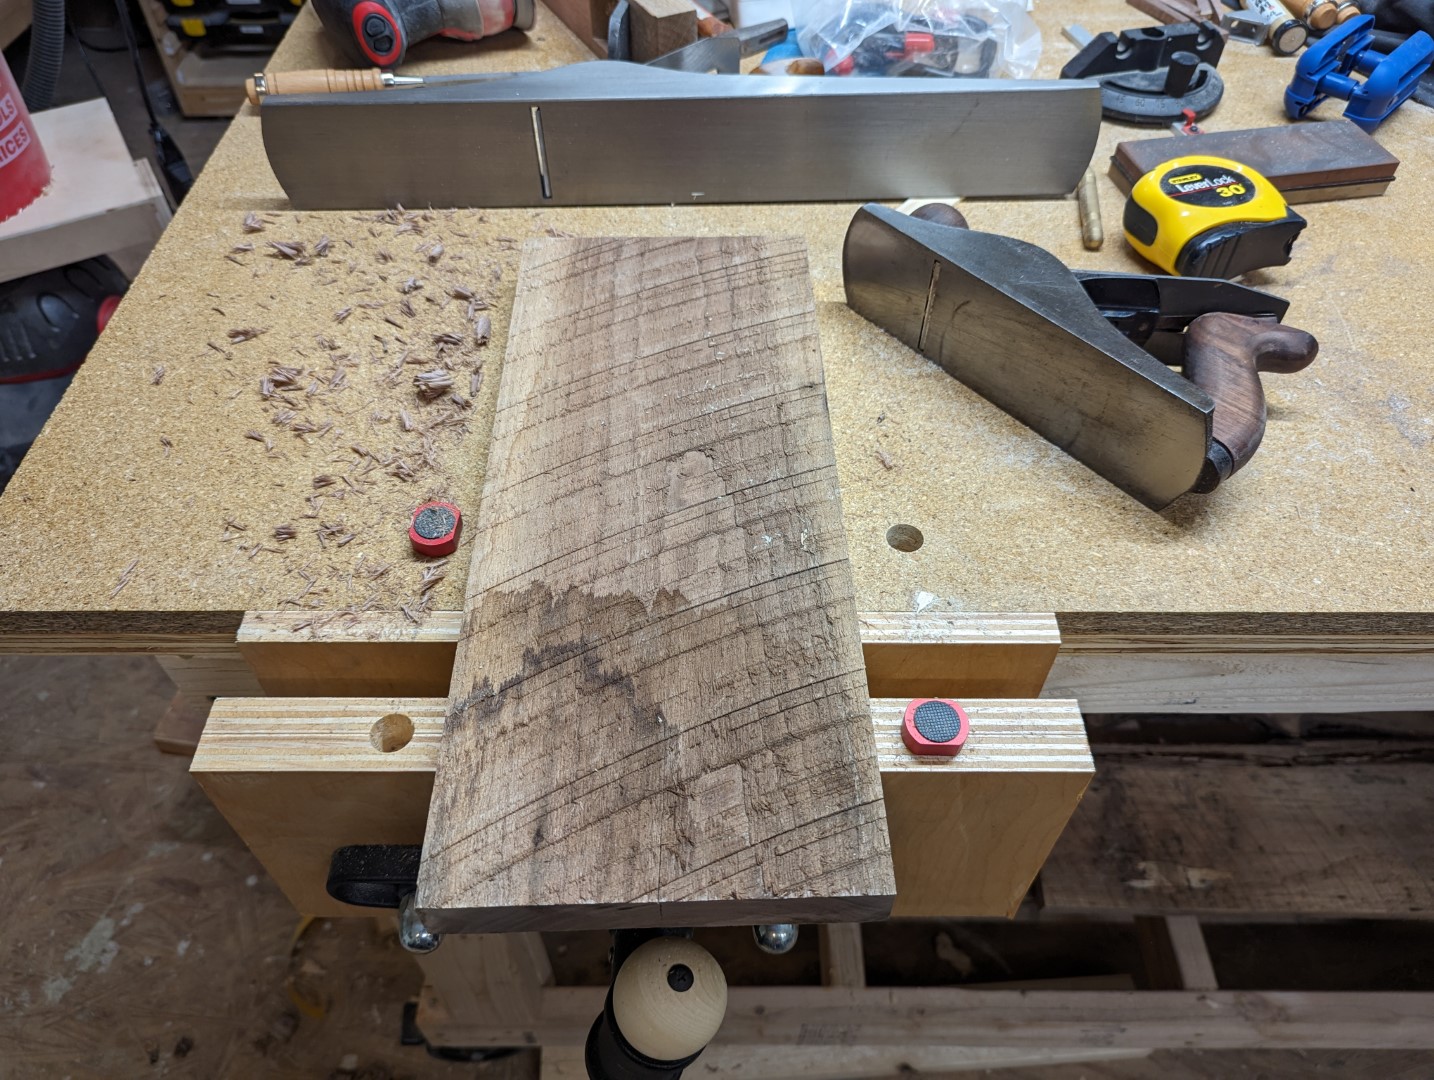

Once the faces and edges were flattened I slowly took passes on the perimeter to get it to fit perfectly into the opening for the drawer, using some washers as spacers to keep a small, consistent gap.
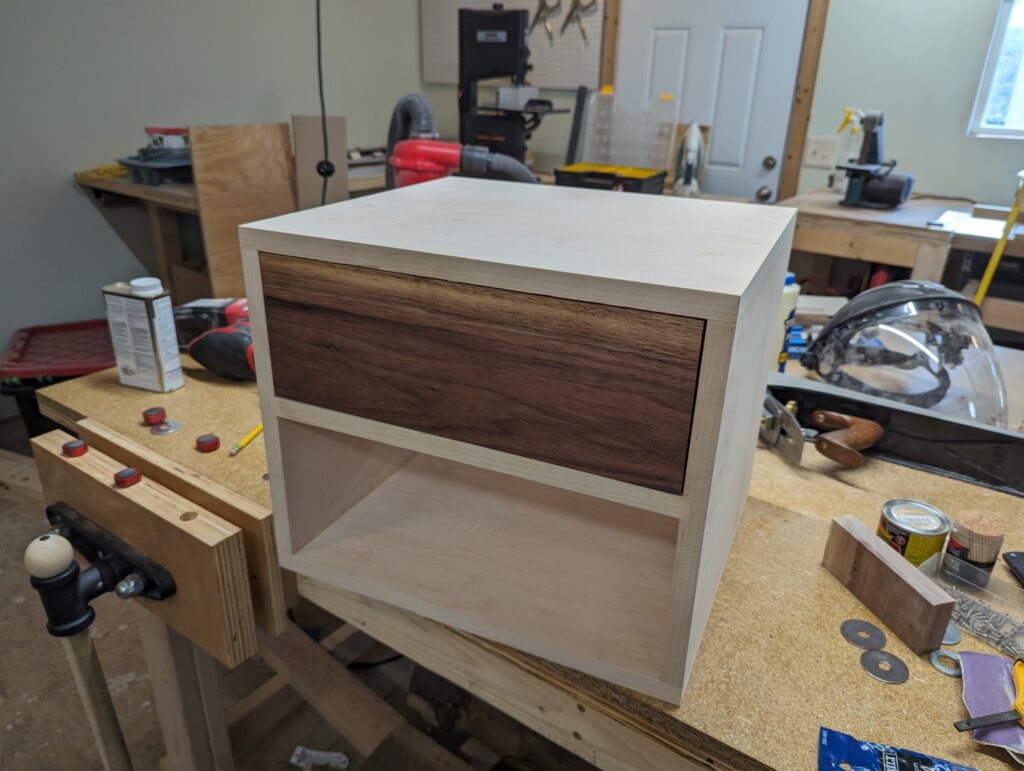
With the drawer face completed I quickly made a simple drawer with some 1/2″ plywood leftover from another project, and conveniently forgot to take any pictures of it.
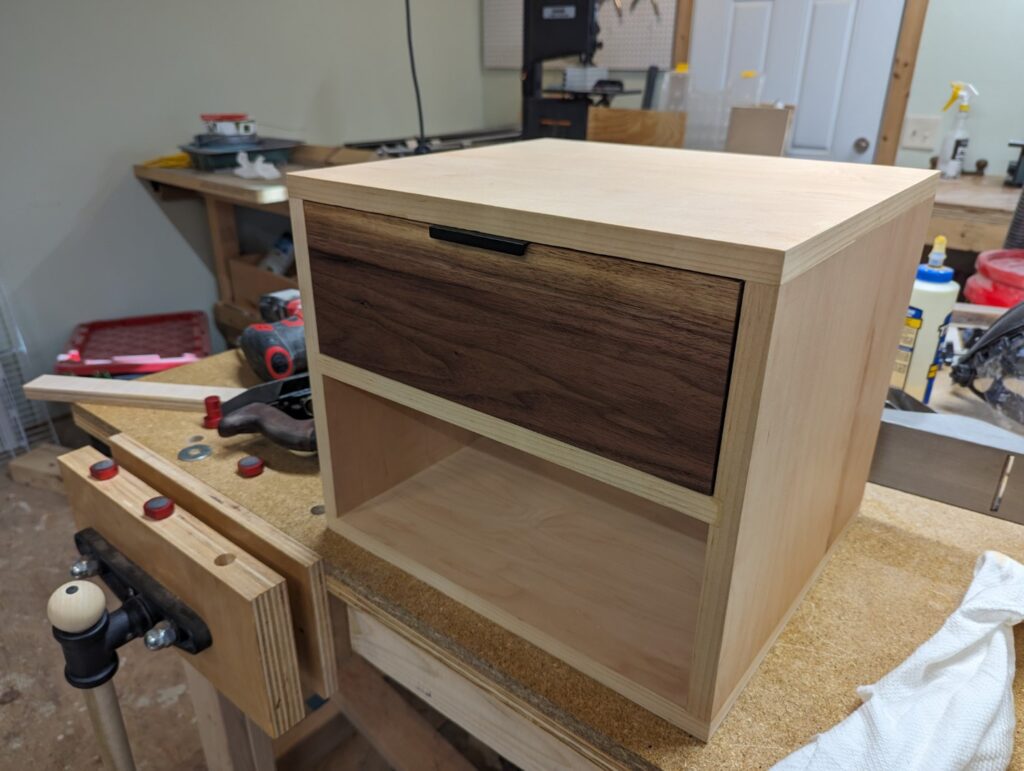
Finishing the cabinet consisted of a heavy coat of Danish Oil left to sit overnight and then a few passes of MinWax paste wax to add a coating. Admittedly it “ambered” the color a little more than I would have liked, but I still think the contrast between the face and case turned out awesome.
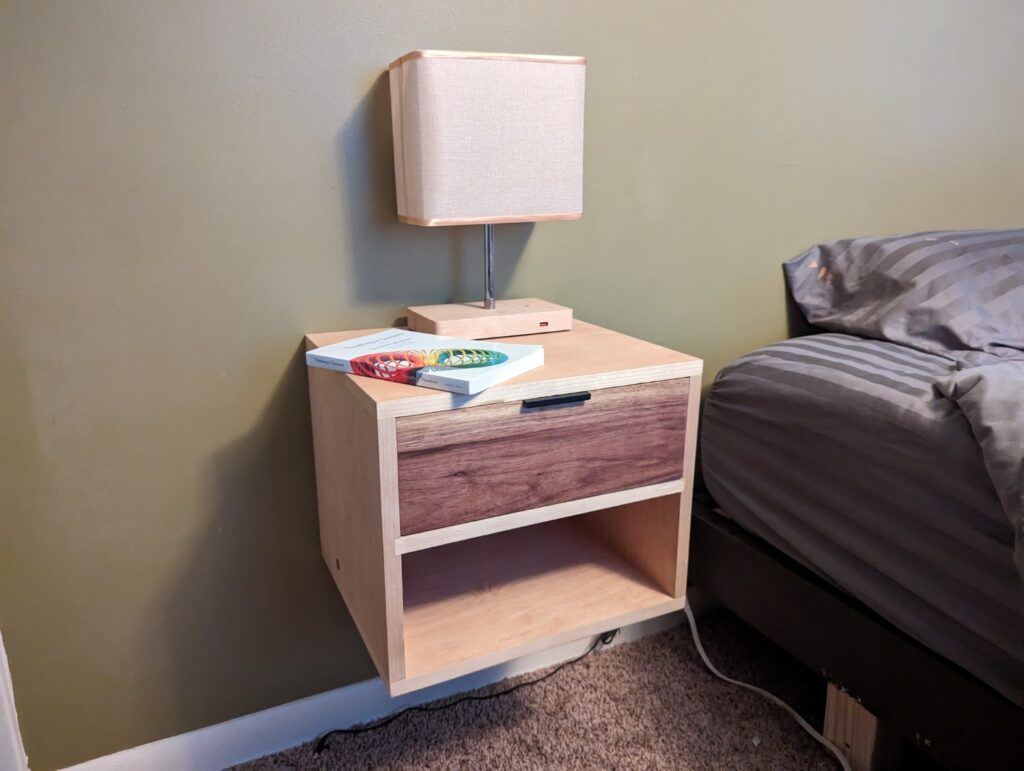
Finally done! Time to hang it up. The cabinet has a cleat on the back, a mirrored cleat was attached to the wall into a stud dead in the center. A couple drywall anchors just to help hold it level/steady. Then once the cabinet itself is hanging on, I drove another screw through the cabinet’s cleat into the stud. Rock solid!
Overall very happy with how it turned out! Learned a ton (especially how not to do edge banding), it’s not perfect, but it was a really fun project!