I make heavy use of these “shoebox” plastic storage totes, they’re excellent for helping separate out different pieces and components. However, my organizational method for the totes themselves leaves a lot to be desired. Since I moved into this house, I have just been shoving them into this empty under-cabinet area:
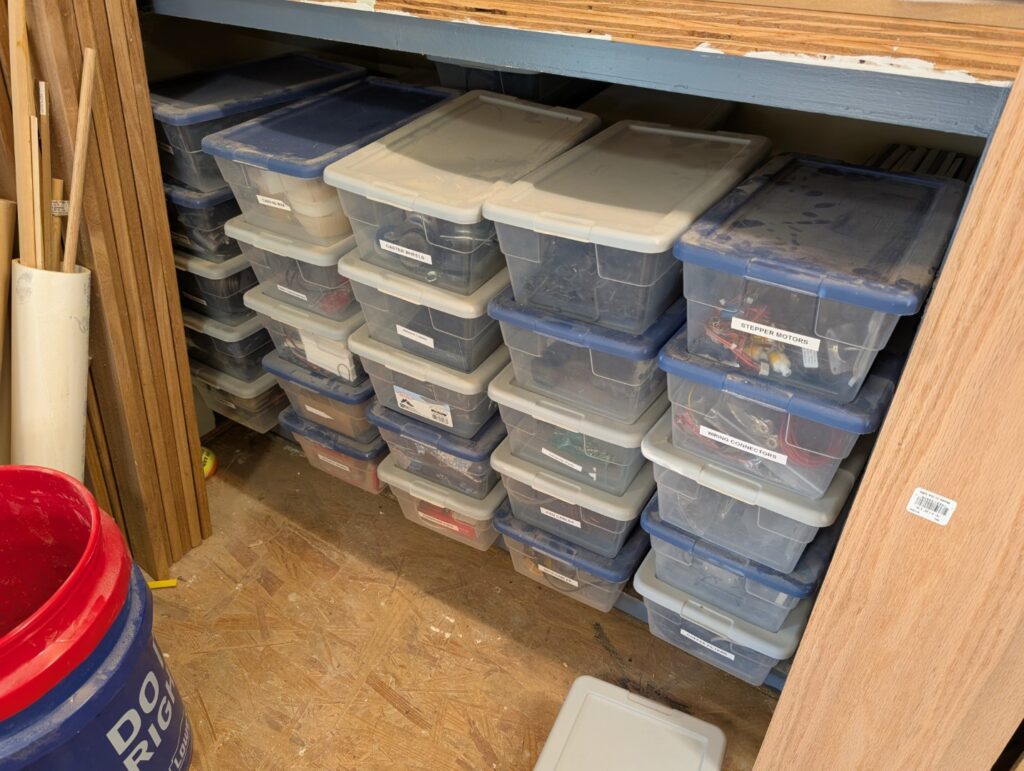
This is not great for actually finding things. There’s two “layers” of totes, so getting to the items behind the ones in front is annoying, and they have collected a fine layer of sawdust across the totes, making it just messy to find things.
So I wanted to build a cabinet that I could slot all these into. My workshop has a small “closet” that would be perfect to place these in, so let’s build something!
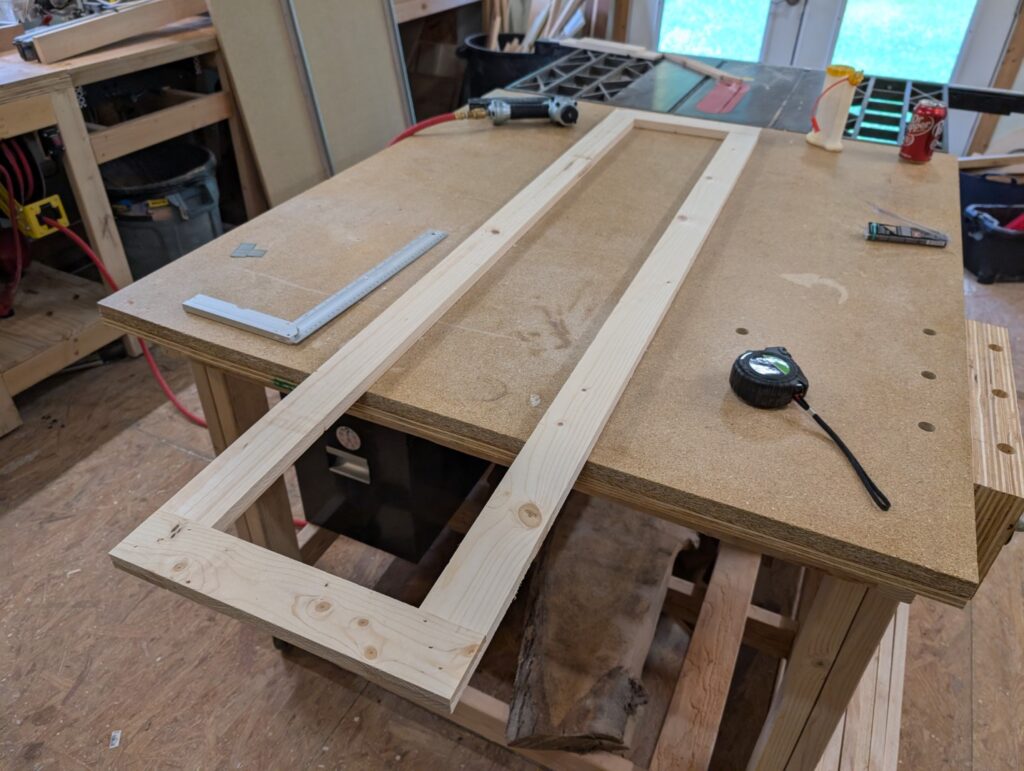
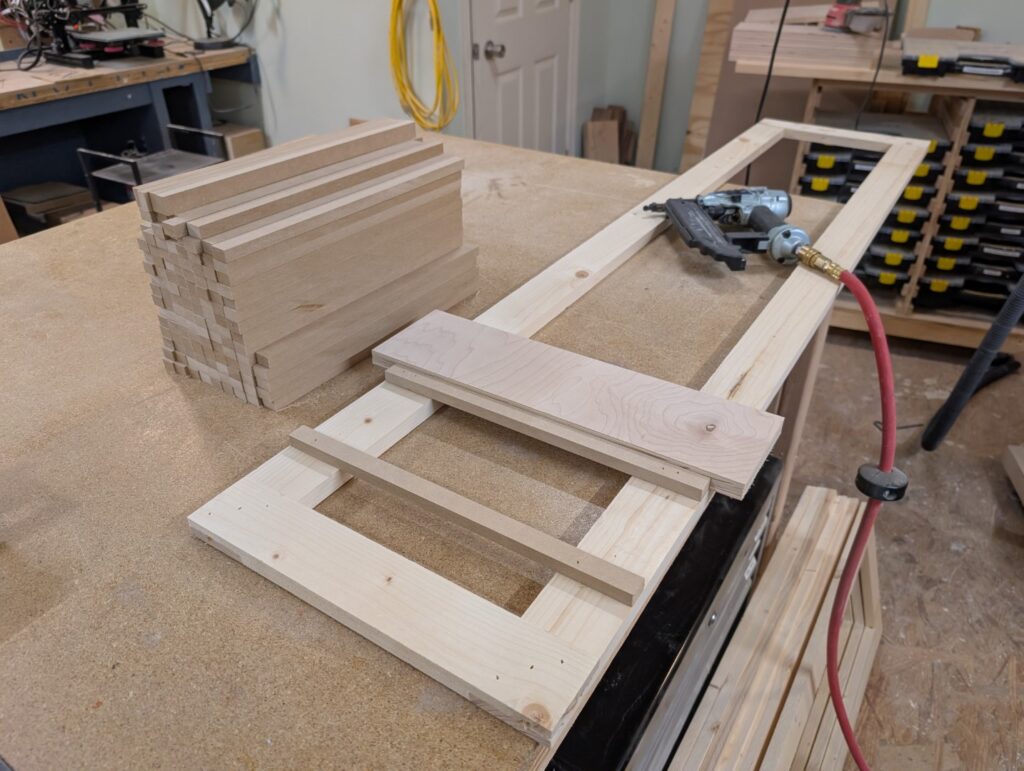
I started out with some simple pine furring strips, the plan was I would build a number of square frames to act as the uprights for the cabinet. This is one of those projects where I was basically just throwing things together and didn’t have a solid plan going into it, and building these frames I iterated a few times to get the right process. So first, let me show you the end result (at least for the upright pieces) that I was trying to get to:
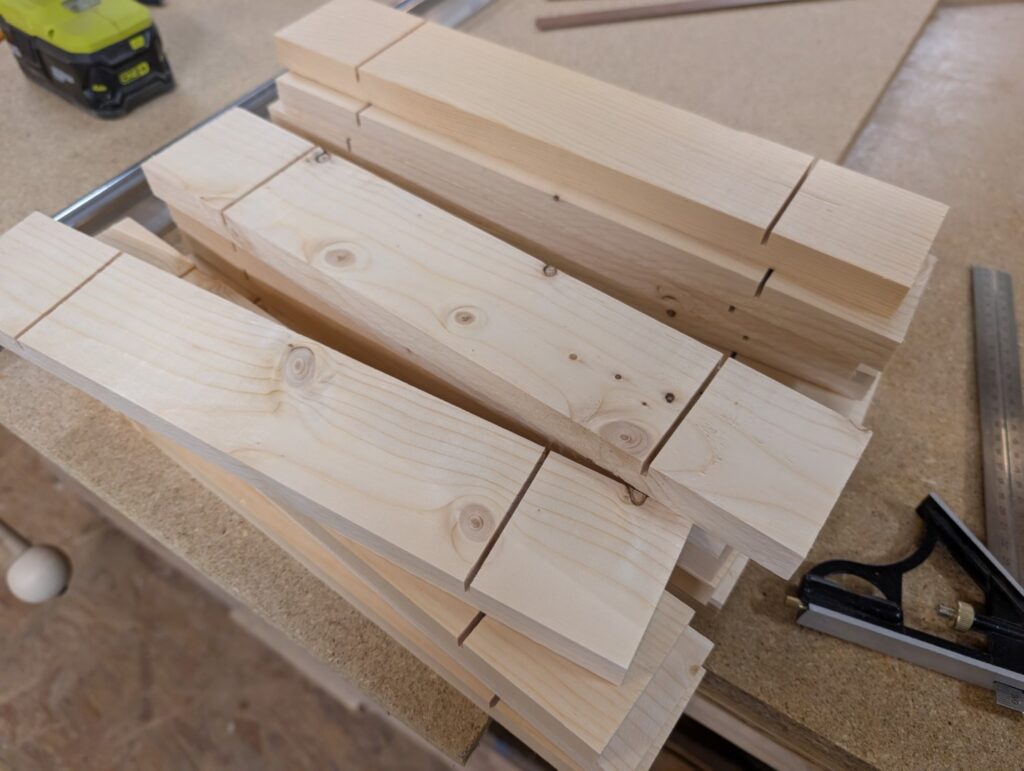
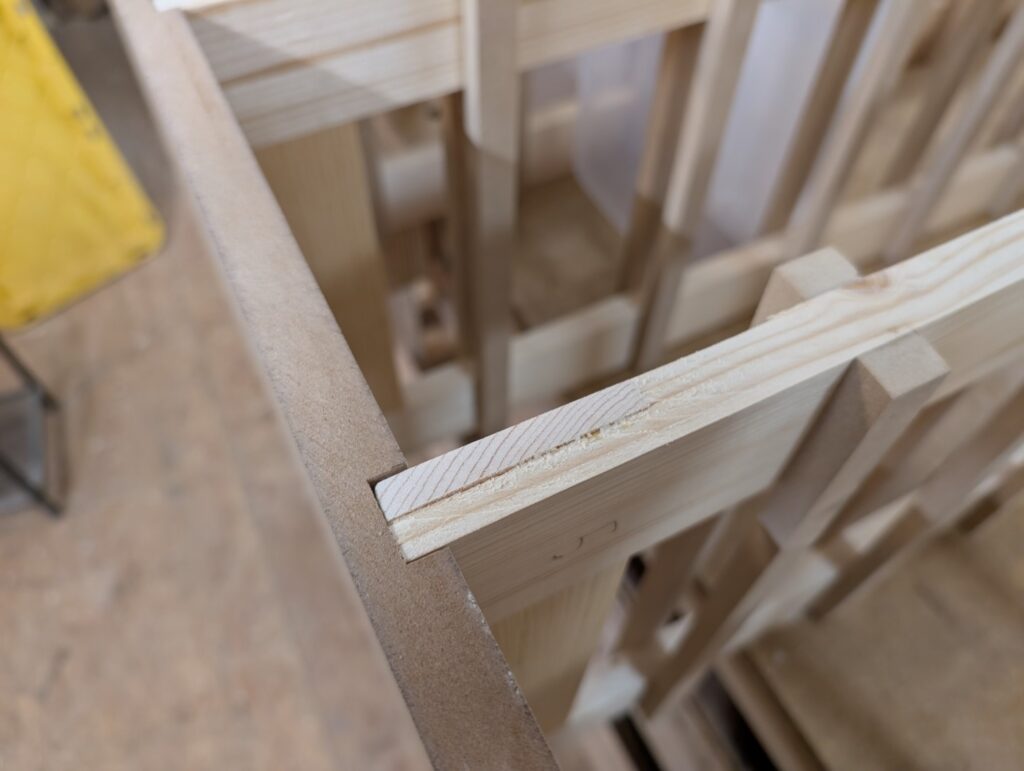
Now I needed to create 6 of these uprights, and each upright consists of two horizontal boards and two vertical boards, with overlapping joints. Cutting those notches out so the boards overlap presented me with a bit of a challenge for how to do it efficiently.
I started out by using the table saw, crosscut sled and a stop to create the inside edge of the pocket:
This works, and in the past when I’ve had to create channels or notches in pieces, I’ve gone with the simple method on the table saw of make a cut, move the board over slightly, make another cut, repeat until the whole channel is cut out. But I had to do this 48 times! The table saw was not going to be the best way to approach this.
So the next idea was to use my flattening jig that I used for my Illuminated House Numbers project, tack in some strips to consistently hold these boards in the same place, use some toggle clamps to hold the boards down, and use the router to carve out the notches:
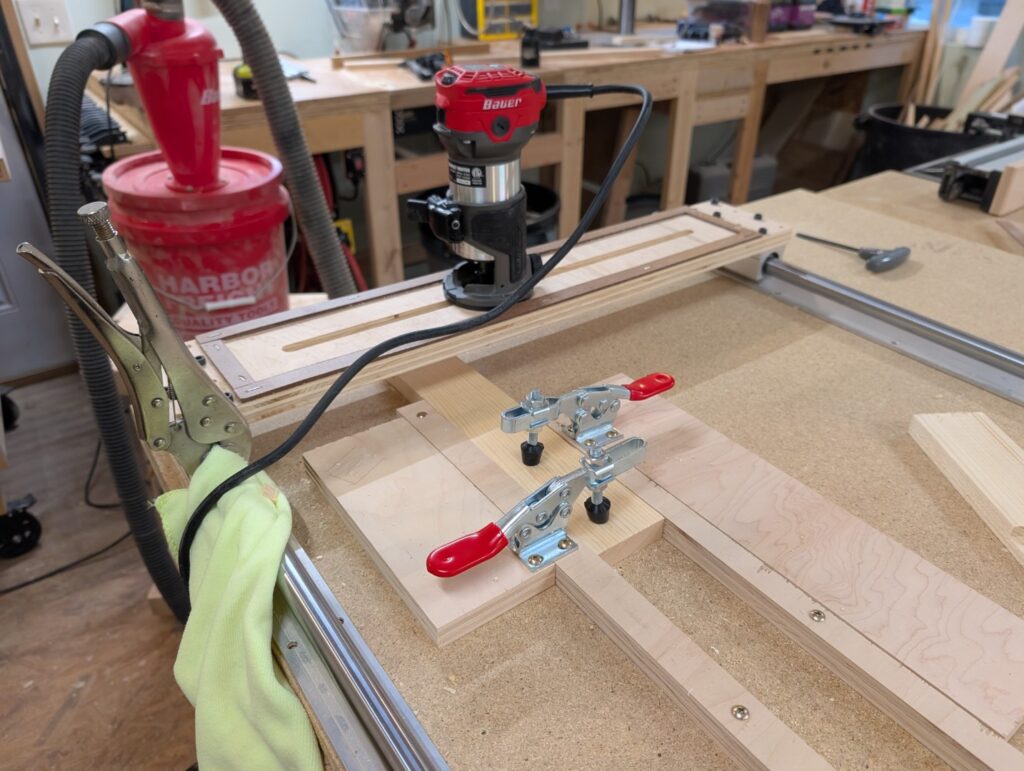
This did work relatively well, and I think it actually would have been the preferable method. However because I was using possibly the cheapest wood and router bit possible there was a massive amount of tearout, in one case it started to completely split the board. So while it would be efficient, it was not the perfect method.
I briefly considered using the CNC router to cut these out, and I think the small bit and higher cutting speed there would have worked, but the speed would have been a very limiting factor. It would have taken multiple passes per notch, and can realistically only handle a 1/8 to maybe a 1/4 inch bit. Each notch would have taken around 30 minutes, and that just wasn’t the kind of time I wanted to sink into this.
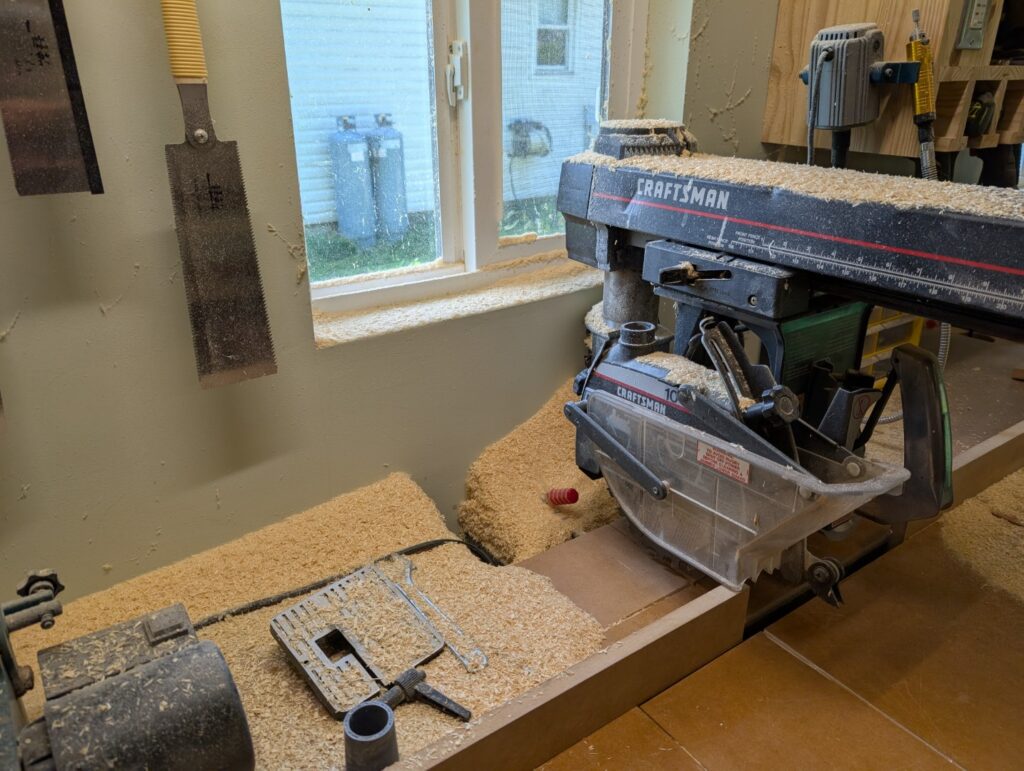
So, I finally broke down and got out the dado stack and set it up on my radial arm saw. I will be honest, I really do not like dado stacks. Something about the arrangement of multiple blades and a lot more weight spinning at that kind of speed just gives me a strong “you’re gonna lose your thumb” vibe. But, it really is the right tool for this job, and properly set up they made quick work of all the notches:
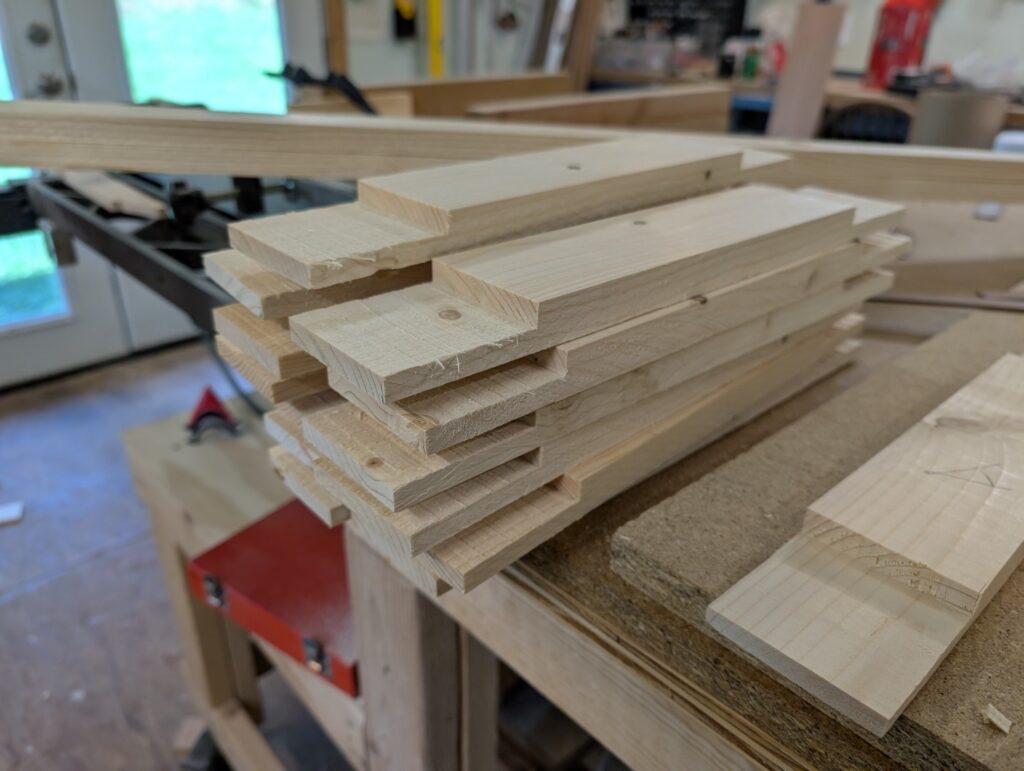
Okay, we’ve got all 24 boards cut to make the uprights, let’s get them assembled! My process for assembly was pretty straightforward, lay a thick bead of glue down on the notches, put the two uprights and two horizontals on the workbench and use the nail gun to drive one nail into each corner. I could then measure corner-to-corner to check for squareness, and tweak the frame slightly to bring it into square. I finished by putting in a couple more nails into each corner to make sure it would move while drying.

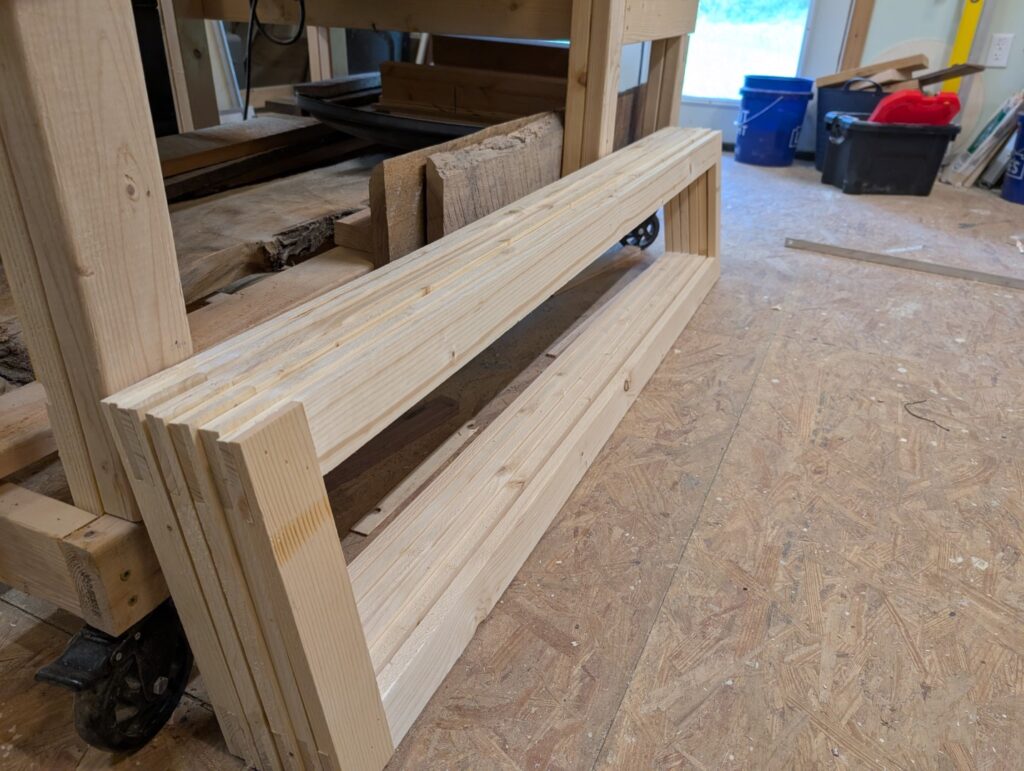
I now had a stack of 6 of these frames, to ensure they were consistently the same size I picked the shortest one as a reference, and used a flush-trim router bit to clean up the height of the others.
Now we need runners of some kind of hold the actual totes. I cut out a massive stack of MDF runners and used a scrap piece of plywood cut down to the height of the totes to act as a gauge, nailing the series of runners down each side:
With the runners attached I could move onto the assembly of the cabinet as a whole. I used a couple of pieces of 1/2″ MDF as the top and bottom of the cabinet, cutting some notches for the uprights to slot into, both to help with alignment and thinking it might slightly strengthen the cabinet as a whole. Assembly of the entire unit was interesting, I believe this is the single largest physical item I’ve made in my shop and it definitely made it feel cramped!
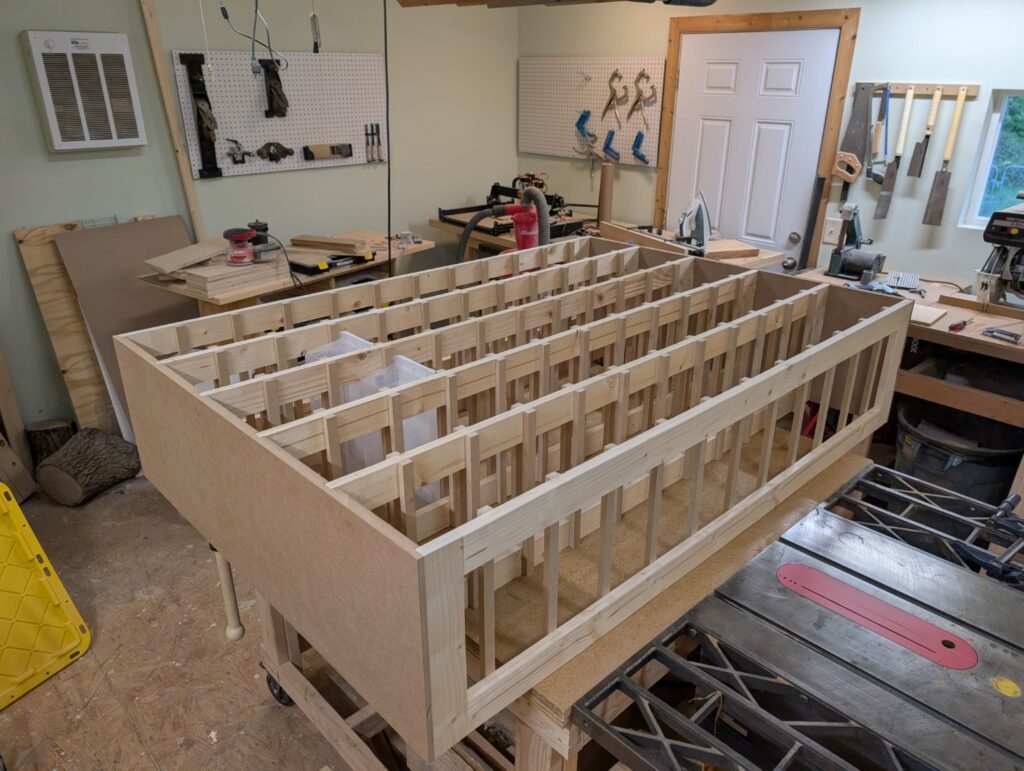
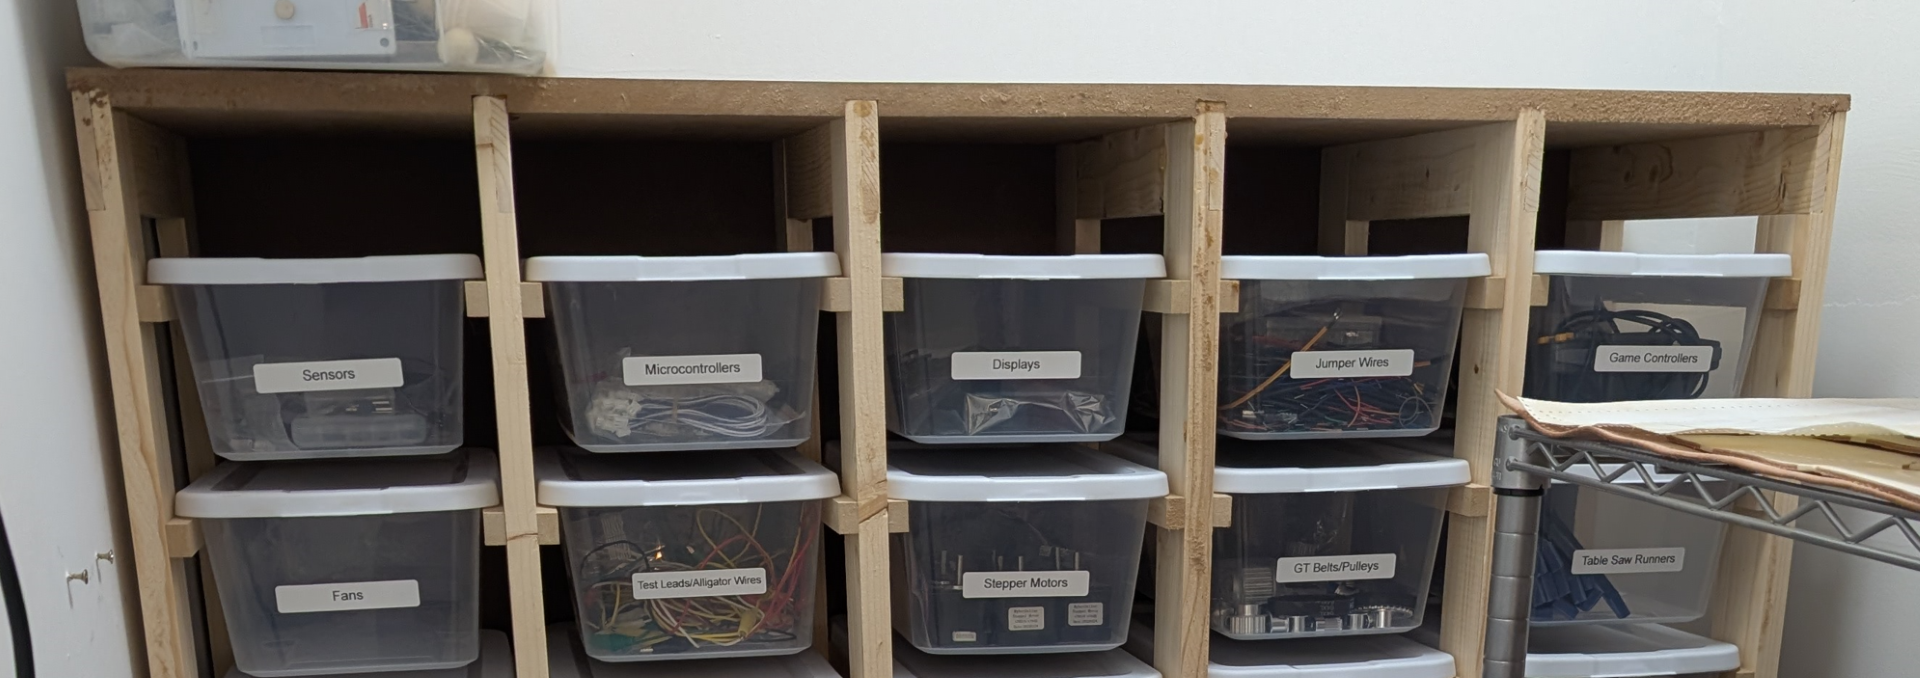
As a final step I attached some fiberboard backing, and moved the cabinet into my workshop closet, adding a couple screws into the studs in the wall to help ensure it wouldn’t tip over and prevent twisting. I was finally able to slot the totes into the new cabinet and it came out exactly as I wanted!
The totes are now well organized, finding things in them is easy, and because they’re in the closet they do not collect nearly as much sawdust!